STM32
Started 22nd January 2016
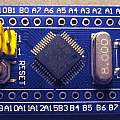
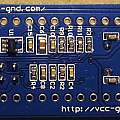
Looking for something like the Arduino Pro Mini but with better performance I bought a board off ebay with the ARM based STM32F103C8T6 chip on. I found the schematic here [9]. Click the photos to see full size.
Fortunately someone has done all the hard work sorting out how to program this board using the Arduino IDE [1] [2].
Key references are [6] and [7]. The first is LeafLabs who did the original work on making STM32 compatible with Arduino. The second is the forum of the group who have continued the work.
There's a quick start page [3] (also [8]). These use "perpetual boot loader" mode to install software; a USB to serial adapter is connected to the STM32. Other methods are better, see below.
Perpetual boot loader (for Windows 10)
To use this one selects Upload method Serial on the Tools menu, the relevant port for the serial to USB adapter also has to be selected.
It would be nice for programming to work just like it does with an Arduino - one click. There's been a lot of discussion [4] [5] but without any apparent conclusion.
Programming requires the BOOT0 line taking high and a reset generating (take the reset pin to 0 V)[10], this puts the processor in software upload mode. The simplest approach is to leave the BOOT0 jumper in the high position and press the reset button prior to the IDE generating code. Once code is uploaded the processor will run it.
There are two lines on a typical USB to serial (FTDI etc) interface, RTS and DTR which might be wiggled to automate programming. The Arduino IDE typically sets both to 0 V whilst programming is going on, and does the same when the serial monitor window is opened. The serial upload command used by the STM32 Arduino IDE extension permits RTS and DTR to be changed.
One idea for automation is to connect DTR to reset (leaving the BOOT0 jumper in the high position). The file that does the upload is serial_upload.bat and the stm32flash line can be changed to pulse DTR:
stm32flash -i -dtr,-dtr,-dtr,-dtr,dtr,dtr,dtr,dtr,dtr,dtr,-dtr,-dtr,-dtr,-dtr,-dtr: -g 0x8000000 -b 230400 -w %1
This may not work because the default settings for the COM port have DTR at 0 V and spurious resets will be issued when the port is opened. That can be fixed using the Windows command (for the relevant COM port):
MODE COM7 dtr=OFF
Opening the serial monitor or initial power up will put the board into software upload mode. Traditionally at this point one sprinkles a few discrete components to make things work. Better than that I thought to use an Arduino Pro Micro based on the ATMega 32u4 to act as a dedicated USB to serial interface [12] [13] [14] which could spot DTR being waved extravagantly, set the BOOT lines and issue a reset.
I didn't get very far because the version of Arduino IDE which allows the Pro Micro to be used this way does not work with the STM32 extensions.
stm32duino boot loader
Plan B for loading code is to install a boot loader in the STM32 board. This is a different boot loader to the carved in silicon perpetual boot loader. This one allows the built in USB port to be used for connecting the board to the PC and Arduino IDE. One click compile and upload works, so does the serial monitor window. The BOOT links don't have to be changed and there's no need to press the reset button. Documentation is available [15] [16] [17]. All this is wonderful, just not obvious from Google.
Installing the stm32duino boot loader requires the use of the perpetual boot loader. There's no incentive to automate that, since it is only going to be used once. However it does have to work; I'd been having the occasional problem using the perpetual boot loader to load sketches ("missing ACK") but it failed every time to load the stm32duino boot loader. I eventually got it to work by using the argument to the stm32flash.exe command:-F RX_length[:TX_length] Specify the max length of RX and TX frame
inC:\Users\David\Documents\Arduino\hardware\Arduino_STM32\tools\stm32flash.exe
The default is 256 and I used 64 for both RX and TX.
After that Windows 10 told me my USB device had crashed, not compatible etc - it turned out I'd forgotten to move the BOOT0 jumper back to the zero position. Correcting that everything worked perfectly, programming is just as easy as with an Arduino.
I then bought another board, identical to the first one apart from the URL printed on the PCB. I tried to install the bootloader. Windows would only tell me "the last USB device malfunctioned", device manager showed "device descriptor not found". I tried many times. Online there are tales of PA 12 needing to have a low enough value resistor connected to the USB socket - it did, the components are the same as on the other board.
I'd not followed the actual instructions. After installing the bootloader, I'd connected up the USB lead and discovered that the board did not appear on the Arduino IDE port menu - how was I to set it as the board to be programmed. I'd then Googled and found that the COM port is provided by the sketch. So back to Upload method serial programming (aka perpetual boot loader) and install a sketch. Re-connect USB and get "USB malfunctioned".
This is wrong. Installing the bootloader overwrites the current sketch. After installation and connecting via the built in USB socket there is no entry on the port menu. BUT the board can still be programmed. Simply select Upload method STM32duino bootloader, upload a sketch and then a port will appear.
Upload method Serial programming apparently corrupts the bootloader.
However after the first successful programming following installing the boot loader it is necessary to pick the relevant port.
See also STM32 with HC-SR04 ultrasonic ranging module.
Sources
- Arduino STM32 files to support STM32 boards on Arduino IDE
- Installing Arduino STM32
- Arduino goes STM32 - quick start
- Discussion about automating perpetual loader
- Experiments with the Arduno IDE connected an STM32F103C8T6
- LeafLabs Documentation Index - original Maple source
- Arduino for STM32 - stm32duino forum
- Programming STM32 with Arduino and Mac - quick start
- Chinese source of board schematic
- STM32™ microcontroller system memory boot mode
- AN4013 timer overview - not very useful
- Using the Leonardo as USB to serial converter
- Expose CDC settings to sketch - changes allow access to DTR/RTS
- USB serial converter sketch for Teensy
- Bootloader Flashing Instructions
- Arduino STM32 Bootloader
- stm32duino bootloader extended information
- STM32F103x8 Programming manual
- STM32F103x8 Reference manual
- STM32F103x8 datasheet
- Handy graphic of pin functions
- How to make a simple auto download circuit for STM32
- LeafLabs Maple forum
David Pilling's Wiki
Set view

